Making custom patterns in Photoshop is a very easy process.
If you’re like me then having the ability to create your own patterns will make your work stand out and become much more unique and after all that’s what our clients are paying us for. Its a quick and simple but highly effective addition to your Photoshop skills.
Photoshop comes installed with a range of basic patterns, but sometimes you’ll need to create your own. There are several ways to make patterns and I’ll detail a couple of ways here.
So lets get started.
The hand drawn pattern.
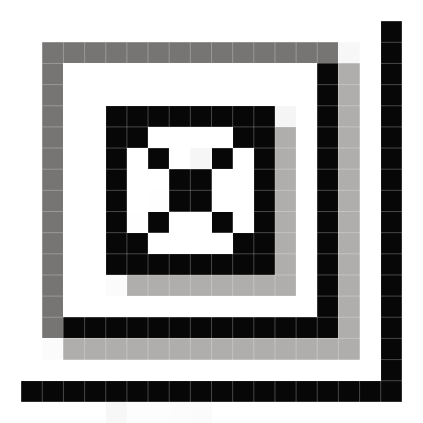
The thing to remember here is that the pattern will repeat both horizontally and vertically so if you want the pattern to be seamless the pixel location on the left of the image should be reflected in the location on the right. Let me show you an example before we start making our pattern.
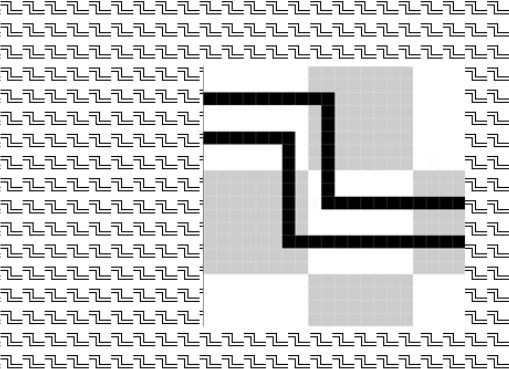
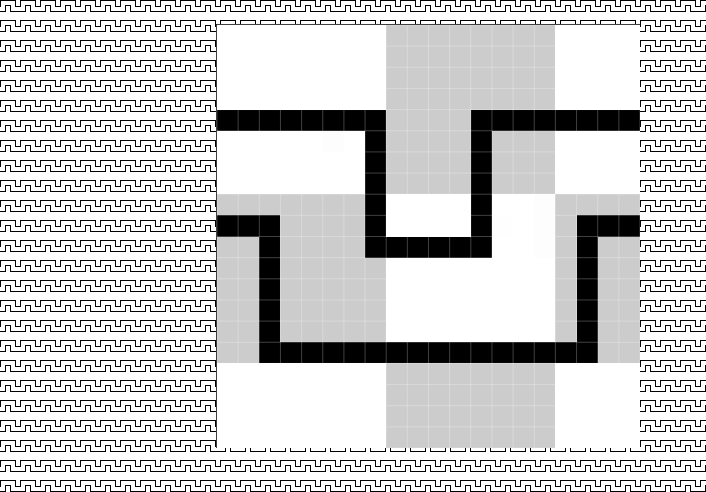
As you can see the pattern does not flow across our image because it isn’t symmetrical. Lets look at a similar pattern but with a symmetrical design:
I hope this is clear enough for you. If so, lets make a pattern!
Step One.
Open a new document with a transparent background. The pattern you make will be repeated across whatever you decide to use it on, so bare this in mind when choosing your size. For this example I will make it 20 x 20 px.
Zoom in really close so you can see what you’re doing and click on the brush icon in your toolbar then right click on it again to open up the options.
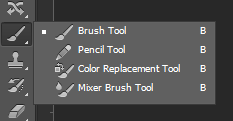
We’re going to select the Pencil tool and set the size to 1px with 100% hardness as this will give us a nice clean line, if we use the brush instead it will be very blurry and difficult to control at this small size.
Step Two.
For this example we’ll make a simple little mosaic pattern.
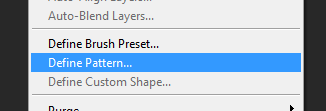
Once you’re happy with your design go up to the menu bar and > Edit >Define Pattern
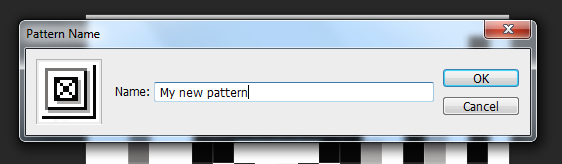
A dialog box will appear. You can name your new pattern if you like and then hit OK.
Good work! Your pattern is complete.
Step Three.
To use your new pattern in any document simply click on the Paint bucket tool in the tool bar

Then select Pattern from the dropdown menu at the top
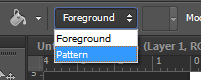
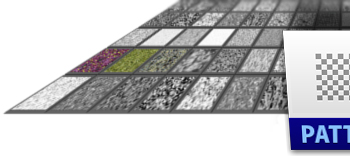
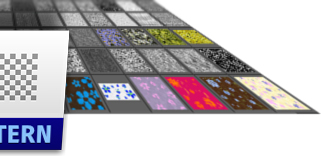
A small thumbnail image will appear beside the menu and click on it to expand it, choose your pattern
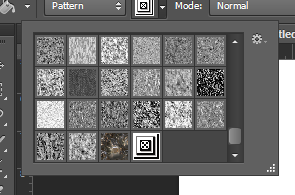
and click on your image to fill it with your pattern.
With patterns you are not restricted to only one color, you can get as creative as you like and make some really stunning designs.
Lets take it a step further and create a pattern from some images.
With this example we’re going to make an offset pattern.
You can grab the same images I used here:


Step One.
Open both images and first we’ll work on image1.jpg
Right click on the layer in the layer panel and select Duplicate layer.
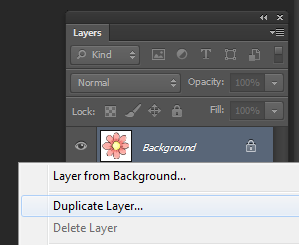
A dialog box will appear and click OK.
With this layer selected go up to the menu bar and select |> Filter > Other > Offset.
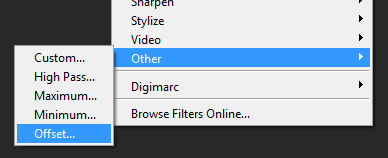
Another dialog box will appear and we need to enter an offset value of half of the image size. Our images are 160x160px so we will enter +80 in both boxes and make sure the Wraparound radio button is selected.
Click OK to continue.
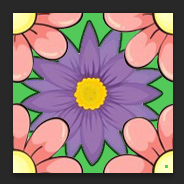
Our flower is now divided into quarters.
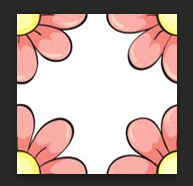
Step Two.
Next we will use the magic wand tool

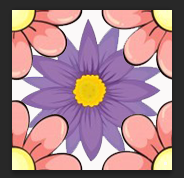
and click on the white background area of the image, you will see the ‘Marching Ants’ around our selection and then cut this away by hitting Ctrl + X on the keyboard. The original image will now be visible. This in itself looks quite nice but I think a little contrasting color will be better so now go to image2.jpg and hit Ctrl + A then Ctrl +C to select and copy the image. Now return to image1.jpg and hit Ctrl + V to paste it into our image. To place it under our offset layer just left click it and drag it under the offset layer.
Step Four.
It looks quite nice but we’ll add one more color as a background to give it a little more depth. To do this make sure your Magic wand is selected and again click on the white followed by Ctrl + X to cut it away. Now click Ctrl and the new layer icon which will create a new layer beneath our current layer. Choose any color you think will look good and fill the layer.
Here’s mine and yours should look more or less the same.
Step Five.
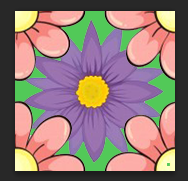
One more thing to do before turning it into a pattern. I would like to add a nice Stroke around the purple flower to seperate it from the background color a little.
Make sure your purple flower layer is selected and then go to > Layer > Layer Style > Stroke.
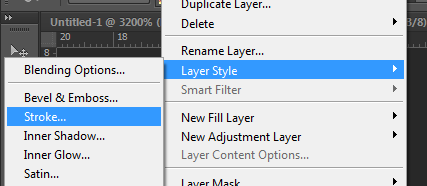
This will bring up the layer Style dialog box.

You can see here that I’ve added a black stroke width of 2px with an Outside position and an opacity of 70% to help keep the image set in the background, as too much opacity will overpower the foreground flower. Feel free to play around with this.
I think we’re done so lets turn it into a pattern.
Step Six.
For an average web page we would get about 9 or 10 repeats which I think will be ok so we’ll leave the size as it is.
Go to > Edit > Define Pattern and hit ok in the dialog box that appears. All thats left is to test it out and see how it looks.
Open a new document. Click on the Paint Bucket tool > Select Pattern in the dropdown menu > Find your new pattern and fill the image.
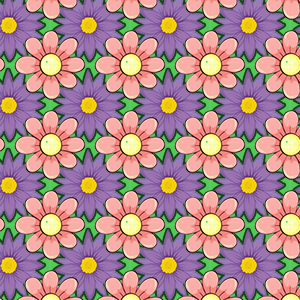
Congratulations – You’ve made your first custom pattern!